Automatic Base Building
Contents
Types
There's a few types of automatic bases, depending on method used.
Bunker
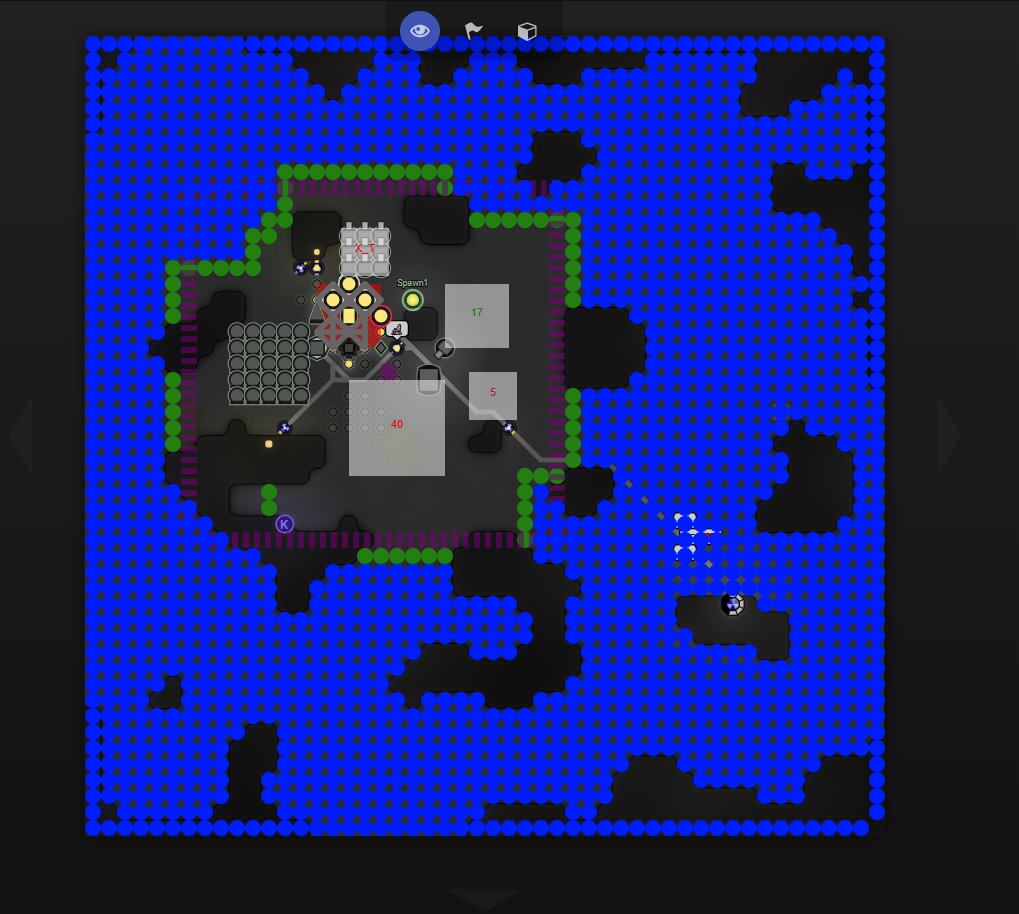
The easiest by far is to have a pre-defined 'bunker' object containing all structures and their locations that you intend to place. An anchor, or the center of the bunker's intended location, can give an offset from where you can place your bunker. So long as an area has enough space, bunkers are a great start with automated basing.
Stamp/Tile-sets
Normally using a core tile/stamp, you can then determine locations for other pre-defined tile-sets/stamps to be placed around your anchor dependent on the terrain in the room. This allows for more flexibility in rooms that do not have large-open spaces that bunkers can not fit in, while still allowing for already designed and known-to-work types of tiles insuring for example, that labs are in-range of other labs for reactions, extensions are in reachable and manageable locations, spawns have open area for creeps to exit, and so on.
Stamps, while more difficult to place and manage, can be an optimal improvement to bunkers, as they can better exploit terrain to reduce the need for barricades. Moreover they can allow for more optimal filling, as well as tower placement based around common attack locations or high-damage positions.
Expand for examples of Extension tile sets, or don't, If you want to make your own.
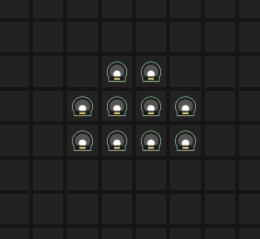
Extension 'field' or groups come in many different shapes and sizes, and can be one-set, or many smaller tiles. Roads often surround or weave to allow for haulers with a 2:1 carry to move ratio.
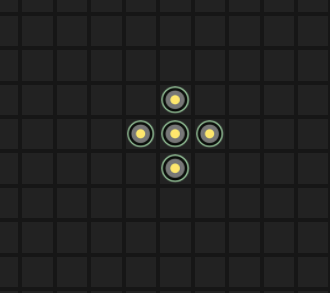
A plus, tileable extension field.
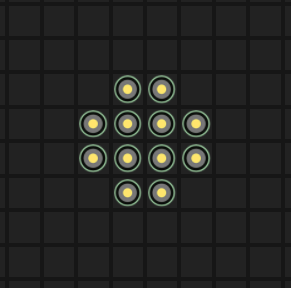
A large plus.
A hallway tile type.
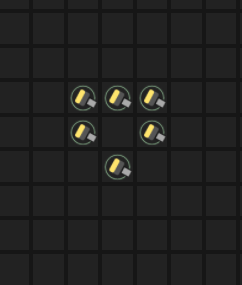
A Dissi Flower extension field.
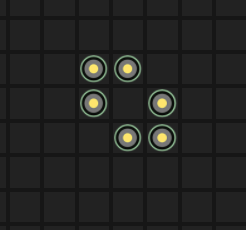
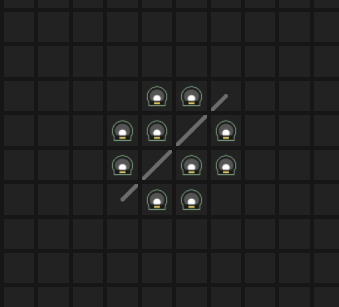
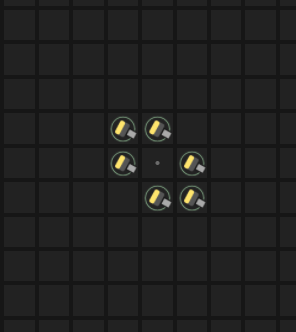
A rapid-fill cluster.
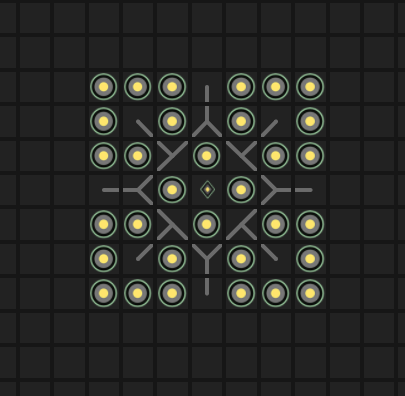
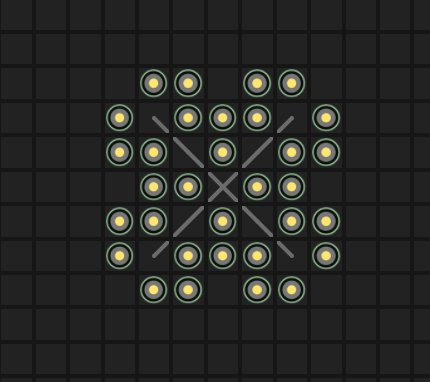
An extension field some-what resembling the Ezic's symbol from 'Papers Please'.
Expand for example of lab tile sets.
Labs are often placed so every lab is in range of 2 to 2 'source labs' to allow for optimal compound production. When placing labs you should also consider their ability to engage in lab rotation with boost production, alongside ease of boosting and unboosting. Containers are often placed adjacent to labs to allow for unboosting resources to drop into them.
Labs in a figure 8 or 'infinity' symbol shape, hallway allows pass-though and 2 position filling of all labs
A stack of labs, where all 8 production labs can reach 2 source labs.
Expand for examples of Tower tile sets.
Towers can be clustered in a single area to allow for ease of refilling, though consequently they will likely have reduced damage.
A single-tile-to-fill cluster of towers
A Hallway style tile single-fill tower cluster.
Expand for examples of Anchor tile sets.
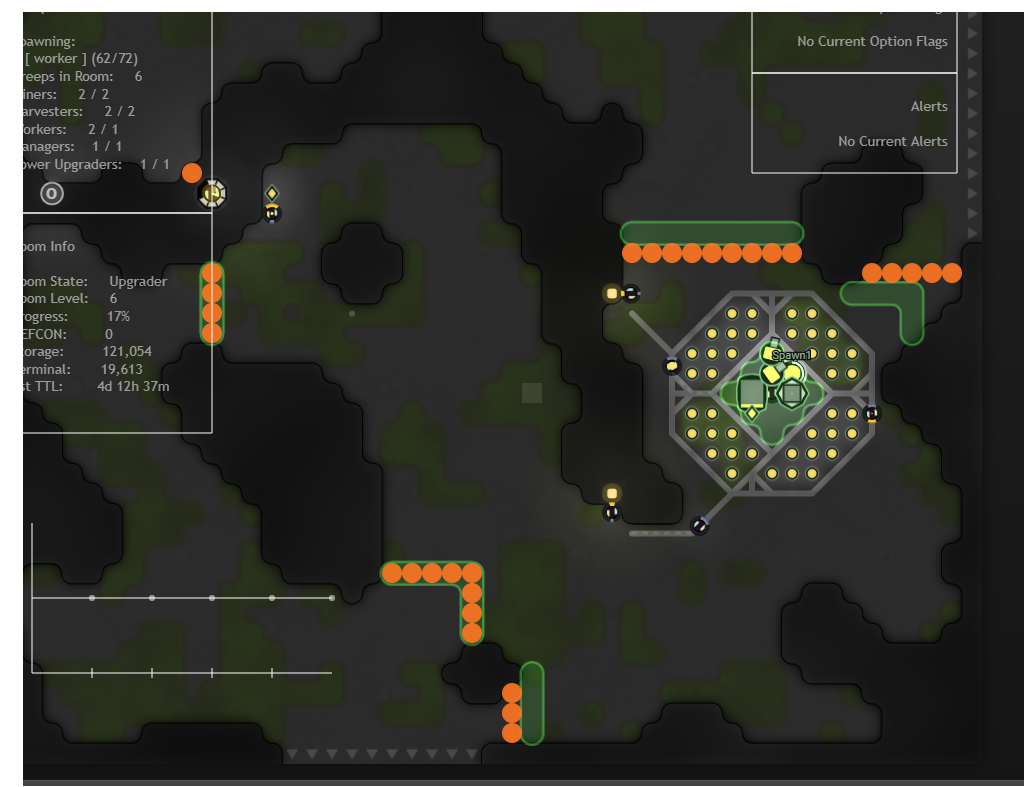
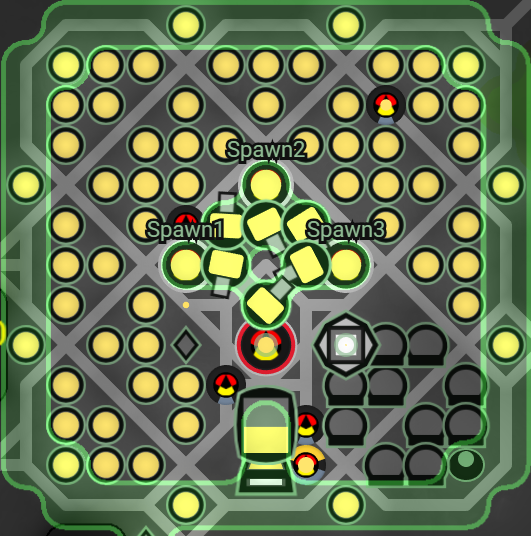
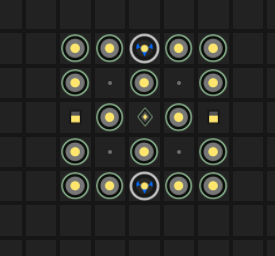
A 'hub', 'anchor' or 'center' fill location can often take 1~ creeps to manage and can be relatively small. They will likely include the terminal and storage, alongside the factory, power spawn and possibly nuker and spawns, and may have the rest of the base planned around it.
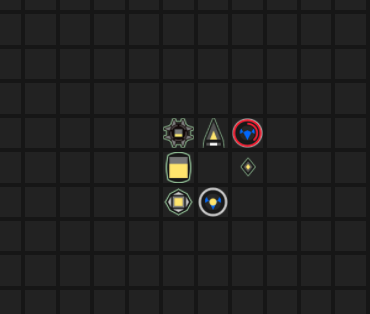
An example of a single-fill-creep position for multiple structures.
Dynamic/Pattern Generation
Using a given open area, you can generate a structure or set of structures grouped together based on some basic rules. Some examples would include generating extension fields for one or more fillers to fill, calculating the best position for towers to sit for maximum damage on walls (instead of in a tight fill-group pattern), and so on.
Useful Algorithms
There are several useful algorithms to take into consideration when automatically building your base.
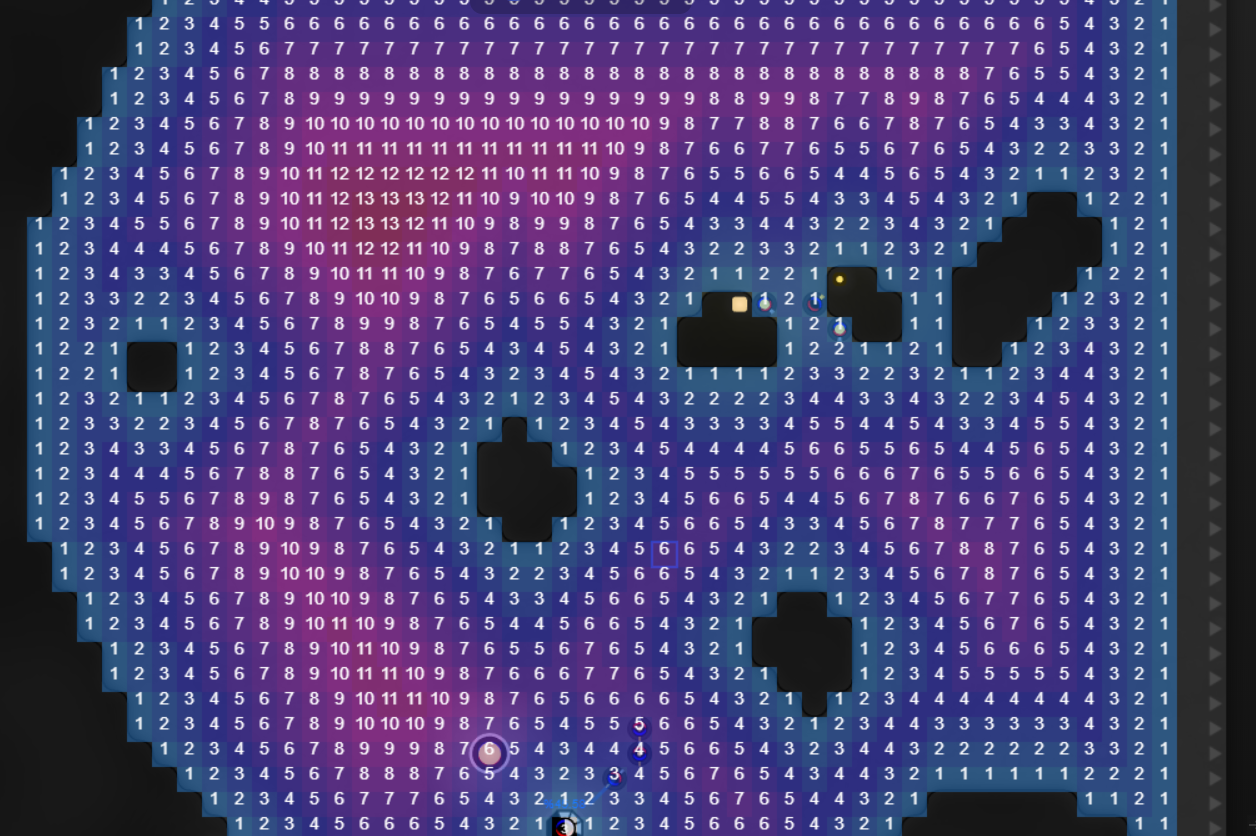
Distance-Transform
Distance Transformation can be paired with room terrain data, such walls and non-walls, to score each room position (in something like a CostMatrix) based on their distance from the closest wall. This is great for finding large open locations to place things like bunkers.
Flood Fill
Flood Fill is useful for defining or testing areas to make sure they are secure (like if there are barricades all around a base) or sectioning areas into groups. Filling an area and gathering room positions allows you to use these positions later, for whatever purpose you see fit.
Minimum Cut
Minimum Cut is useful for rampart and wall placement based around weighted graphs, meaning barricades can be placed at terrain chokepoints, for example.